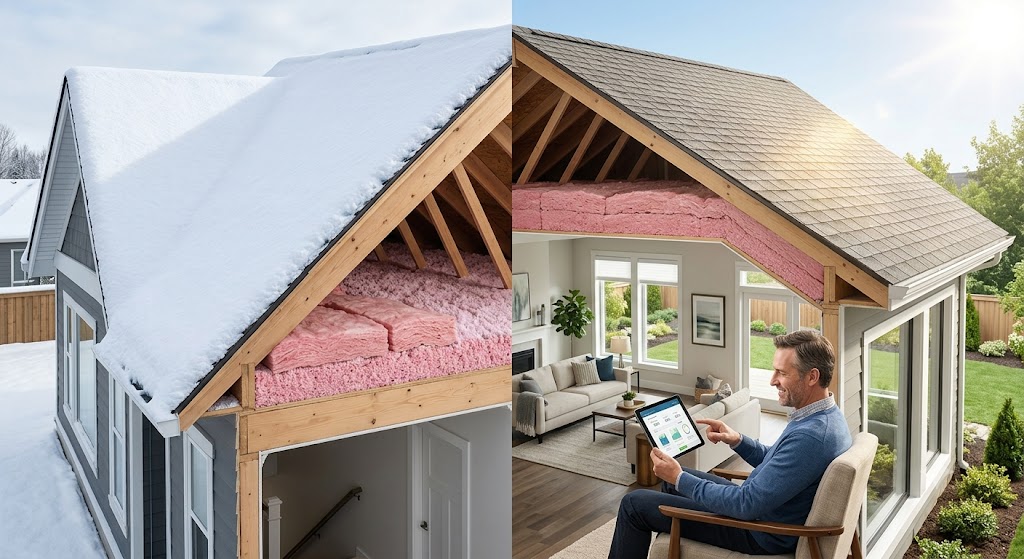


Insulation plays a vital role in keeping your home comfortable, energy-efficient, and protected from moisture. It helps regulate indoor temperatures, reduce noise, and prevent mold growth.
When choosing insulation, you’ll come across two common options: faced and unfaced insulation. Understanding the differences between them will help you select the right solution for your needs.
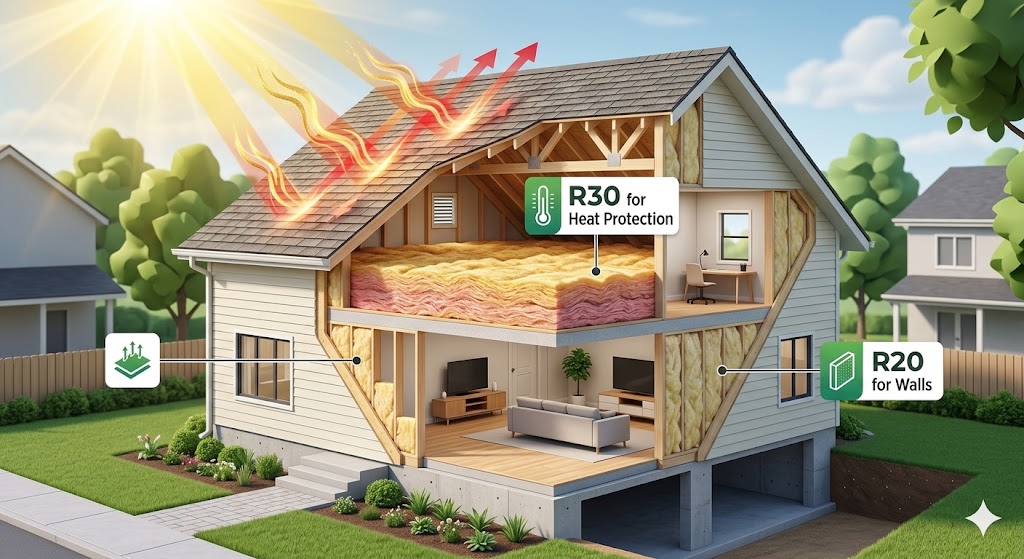
Insulation works by creating a barrier that reduces the transfer of heat, keeping warm air inside during winter and outside during summer.
This crucial layer not only contributes to comfort but also significantly reduces energy costs over time. However, the type of insulation you choose can make a big difference in its effectiveness and application.
What Is Faced Insulation?
Faced insulation features a layer of material, typically kraft paper, foil, or plastic, attached to one side.
This layer acts as a vapor barrier, preventing moisture from passing through the insulation. Faced insulation is designed for areas prone to humidity, such as attics, basements, or exterior walls.
1. Key Benefits of Faced Insulation
- Moisture Control: Blocks moisture, reducing the risk of mold and mildew.
- Ease of Installation: The attached vapor barrier makes it stable and easier to secure.
- Durability: The facing material helps hold the insulation together, preventing tearing.
- Noise Reduction: Adds a layer of soundproofing.
- Energy Efficiency: Helps maintain consistent indoor temperatures by acting as an effective thermal barrier.
2. Limitations of Faced Insulation
- Flammability: The paper backing can be combustible.
- Cost: Slightly more expensive than unfaced insulation.
- Layering Issues: Cannot be layered without proper precautions.
3. Best Applications
- Exterior walls.
- Attic ceilings.
- Crawl spaces.
- Basements prone to dampness.
Faced insulation is especially ideal for new construction or spaces that have not been previously insulated. The vapor barrier ensures that moisture does not seep into your walls or ceilings, prolonging the lifespan of the building materials.
What Is Unfaced Insulation?
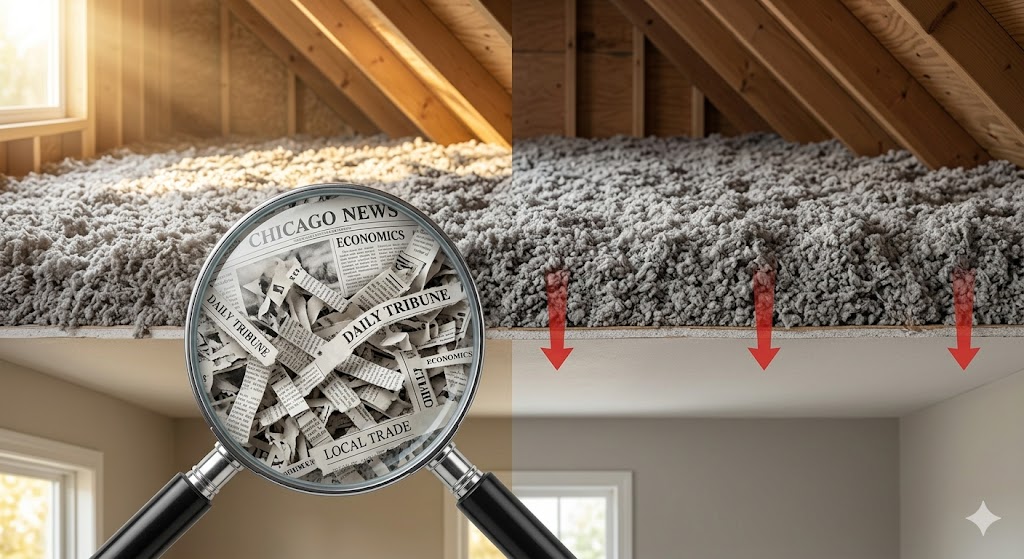
Unfaced insulation, as the name suggests, lacks a vapor barrier. It’s made of loose fibers or batts without any attached material, making it ideal for layering or use in areas where moisture control isn’t a concern.
1. Key Benefits of Unfaced Insulation
- Cost-Effective: More affordable than faced insulation.
- Non-Combustible: Lacks a flammable vapor barrier.
- Versatility: Can be layered for improved insulation.
- Soundproofing: Absorbs sound effectively.
- Eco-Friendly Options: Often made from recycled materials, making it an environmentally conscious choice.
2. Limitations of Unfaced Insulation
- No Moisture Protection: Susceptible to mold and mildew in humid conditions.
- Installation Challenges: Prone to tearing and requires additional support during installation.
- Lacks Structural Stability: Without the vapor barrier, it may be harder to keep the insulation in place during and after installation.
3. Best Applications
- Interior walls.
- Between floors.
- Attic floors over existing insulation.
- Dry crawl spaces or interior partitions.
Unfaced insulation is often chosen for retrofitting projects or to add additional layers of thermal protection where moisture is not a significant concern.
Comparison: Faced vs. Unfaced Insulation
| Feature | Faced Insulation | Unfaced Insulation |
| Vapor Barrier | Yes (kraft paper, foil, or plastic) | No |
| Moisture Control | Excellent | Limited |
| Cost | $0.50 – $2 per sq. ft. | $0.50 – $1.75 per sq. ft. |
| Fire Resistance | Less fire-resistant | More fire-resistant |
| Ease of Installation | Easier | Slightly harder |
| Durability | More durable | Less durable |
| Best Use Locations | Humid areas (e.g., attics, walls) | Dry areas (e.g., interior walls) |
Installation Tips for Both Types
Proper installation is key to maximizing the effectiveness of both faced and unfaced insulation.
Follow these tips to ensure your insulation performs as expected:
1. Installing Faced Insulation
- Orientation Matters: The vapor barrier should face the warm side of the home (toward the interior in winter and exterior in summer).
- Avoid Double Layers: Do not layer faced insulation directly over another vapor barrier to prevent trapped moisture.
- Staple Securely: Use staples to attach the vapor barrier to studs, ensuring stability.
- Inspect After Installation: Ensure there are no gaps or compressed areas, which can reduce effectiveness.
2. Installing Unfaced Insulation
- Fit Snugly: Cut batts to fit tightly between studs or joists, avoiding gaps.
- Add Support: Use wire supports or netting to hold the insulation in place.
- Consider a Separate Vapor Barrier: In humid areas, install a plastic sheet as a vapor barrier over the insulation.
- Layering Advantage: For added thermal performance, unfaced insulation can be layered without concerns about moisture trapping.
Cost Considerations
While both types of insulation are affordable, faced insulation generally costs slightly more due to the vapor barrier.
Here’s a cost breakdown:
| Insulation Type | Cost per Square Foot |
| Faced | $0.50 – $2.00 |
| Unfaced | $0.50 – $1.75 |
For small projects, the cost difference is negligible. However, for larger installations, the choice could impact your budget. It’s worth considering the long-term savings faced insulation can provide in terms of moisture protection and energy efficiency.
Environmental Impact
Both faced and unfaced insulations can contribute to a greener home when used correctly.
Here are some key points to consider:
- Recyclability: Many insulation materials, such as fiberglass, are made from recycled content.
- Energy Efficiency: Proper installation reduces the energy needed for heating and cooling, lowering your carbon footprint.
- Sustainability: Choose products from manufacturers that follow sustainable practices to further minimize environmental impact.
Practical Scenarios: Which to Choose?
1. For New Construction
Faced insulation is ideal for new builds because it simplifies installation and provides essential moisture protection. Use it in:
- Attics: To prevent condensation and maintain consistent temperatures.
- Exterior Walls: To block outdoor moisture and improve thermal efficiency.
2. For Retrofitting or Layering
Unfaced insulation is better suited for adding layers to existing insulation. Use it in:
- Interior Walls: For soundproofing and added thermal protection.
- Attic Floors: Over existing insulation to enhance energy efficiency.
3. For Humid Climates
In regions with high humidity, faced insulation provides the necessary barrier to prevent moisture buildup. However, ensure the vapor barrier faces the correct direction to avoid trapping moisture.
4. For Fire Safety Concerns
Unfaced insulation is the preferred option where fire resistance is a priority, such as in homes near wildfire-prone areas.
Common Mistakes to Avoid
- Incorrect Orientation: Always ensure the vapor barrier of faced insulation is positioned correctly.
- Double Layering Vapor Barriers: This can trap moisture and lead to mold issues.
- Skipping Air Sealing: Before installing insulation, seal air leaks to maximize its effectiveness.
- Using the Wrong Type: Choose insulation based on the specific needs of the space, such as moisture control or soundproofing.
Real-Life Example: Combining Both Types
A homeowner in a humid region used faced insulation for exterior walls and unfaced insulation for interior walls.
By combining both types, they achieved optimal moisture control, soundproofing, and thermal performance. This approach also saved on costs by using the less expensive unfaced insulation where vapor barriers were unnecessary.
For improving your homes’ insulation you can hire us, our expert team will takeover all your stress and you can only take comfort.
FAQs
Conclusion:
By understanding the unique benefits and limitations of faced and unfaced insulation, you can make an informed decision tailored to your home’s needs.
Proper insulation ensures year-round comfort, lower energy bills, and a healthier indoor environment. With careful planning and installation, you can create a space that’s both energy-efficient and comfortable.